Chatting with Agents
The Chat Interface
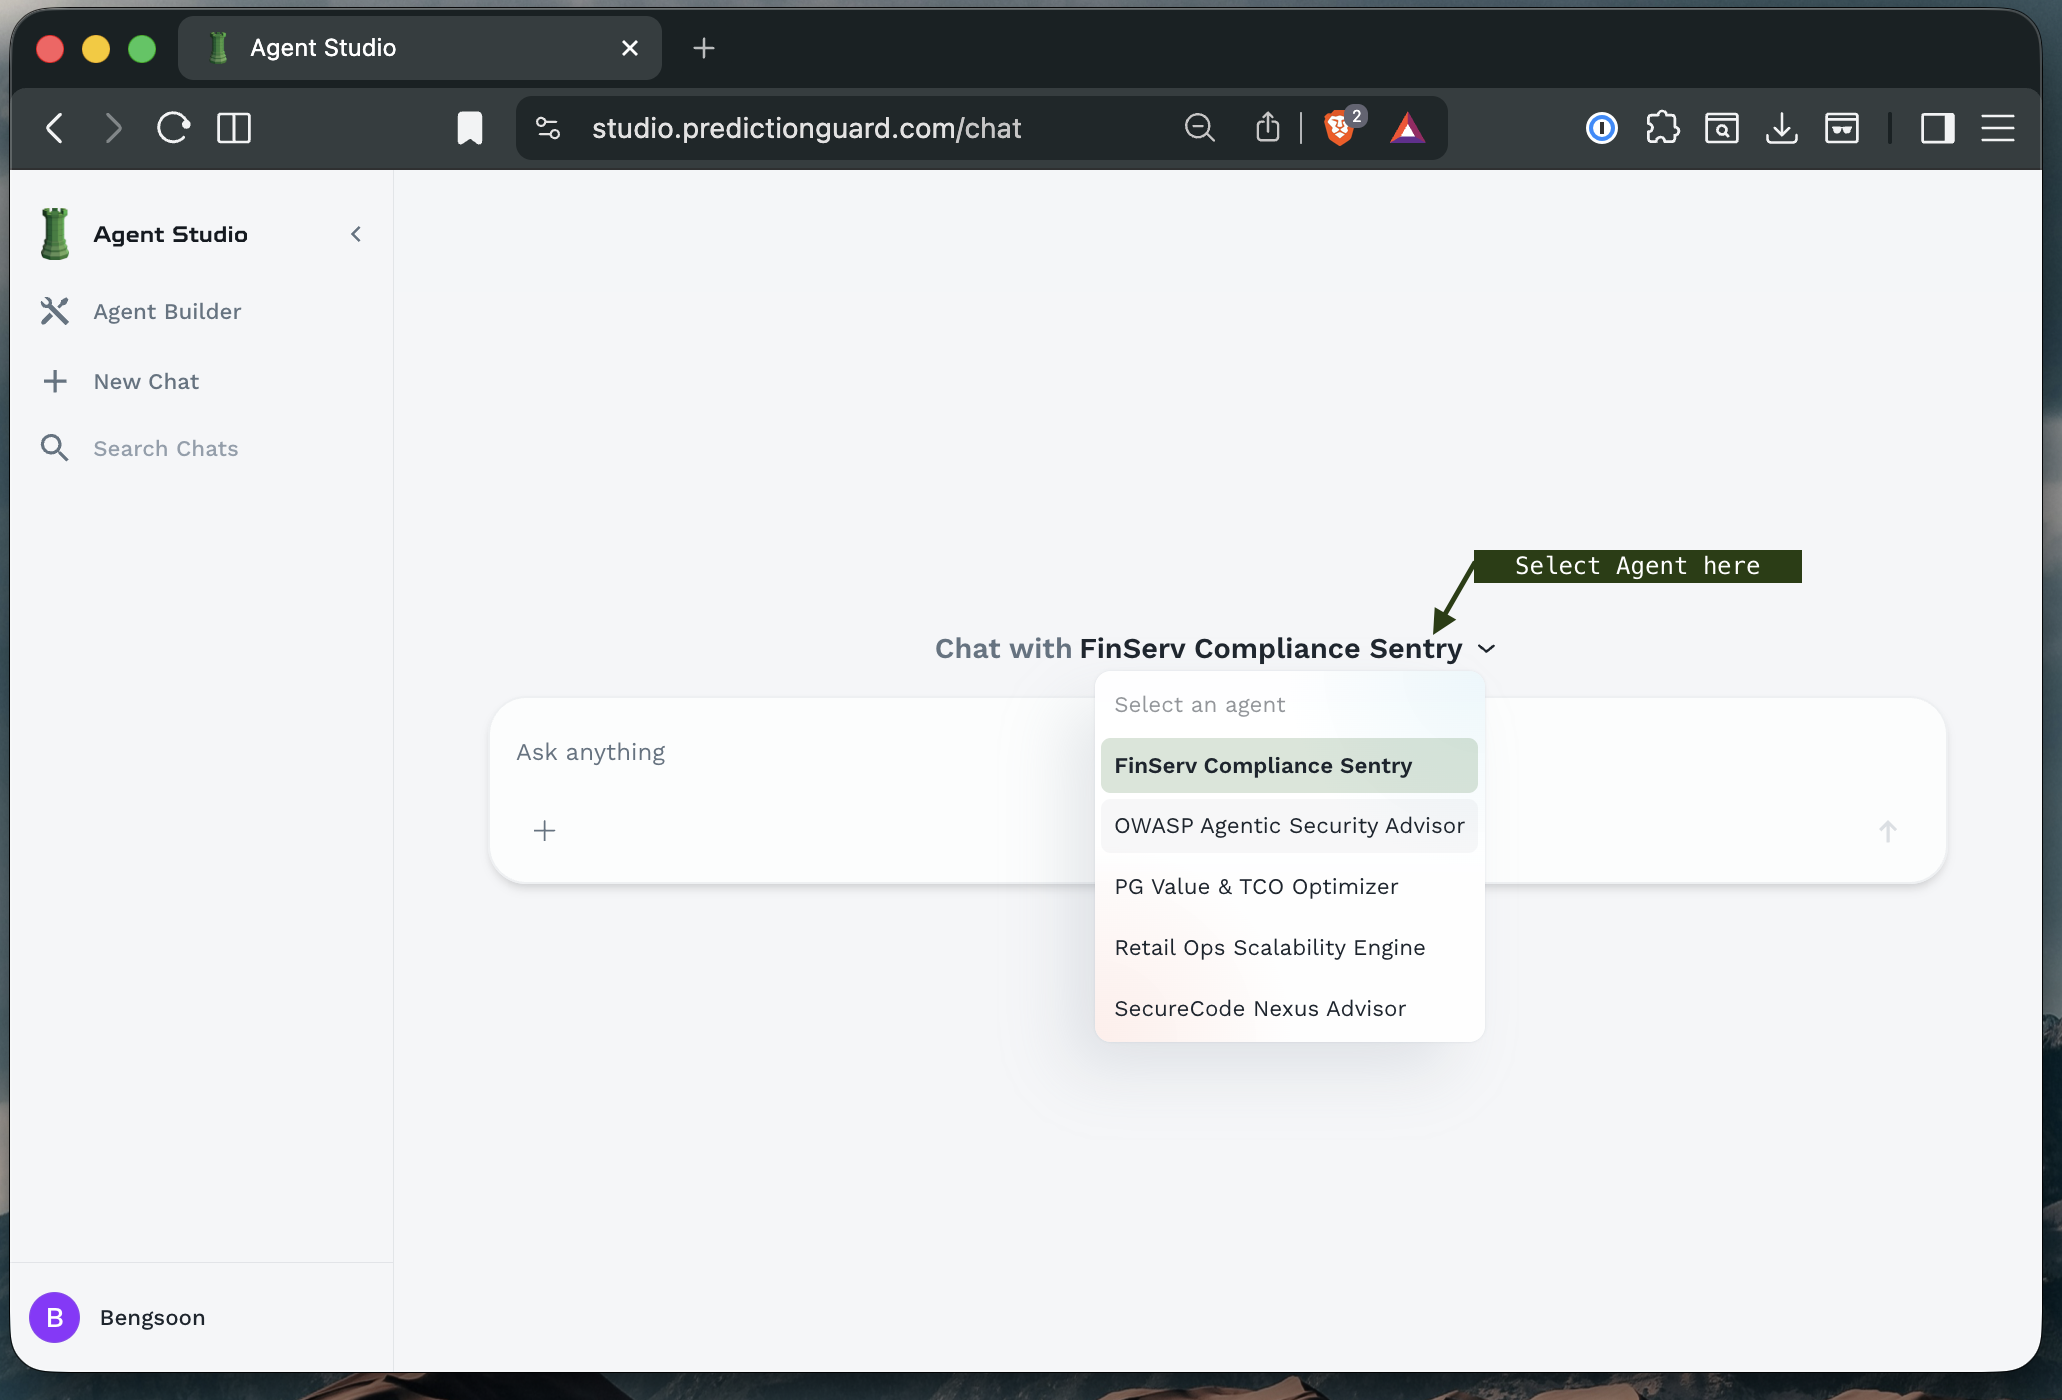
First Screen: Agent Selection
When you log in, you’ll see the main Agent Forge interface with available agents that you have built or shared within your organizations.
Starting a Conversation
Selecting an Agent
- Click the agent dropdown in the main chat area
- Browse available agents - both your personal agents and shared agents
- Click on an agent to select it
- The chat interface will update to show the selected agent’s name
Understanding Agent Cards
In the Agent Builder view, you’ll see agents displayed as cards:
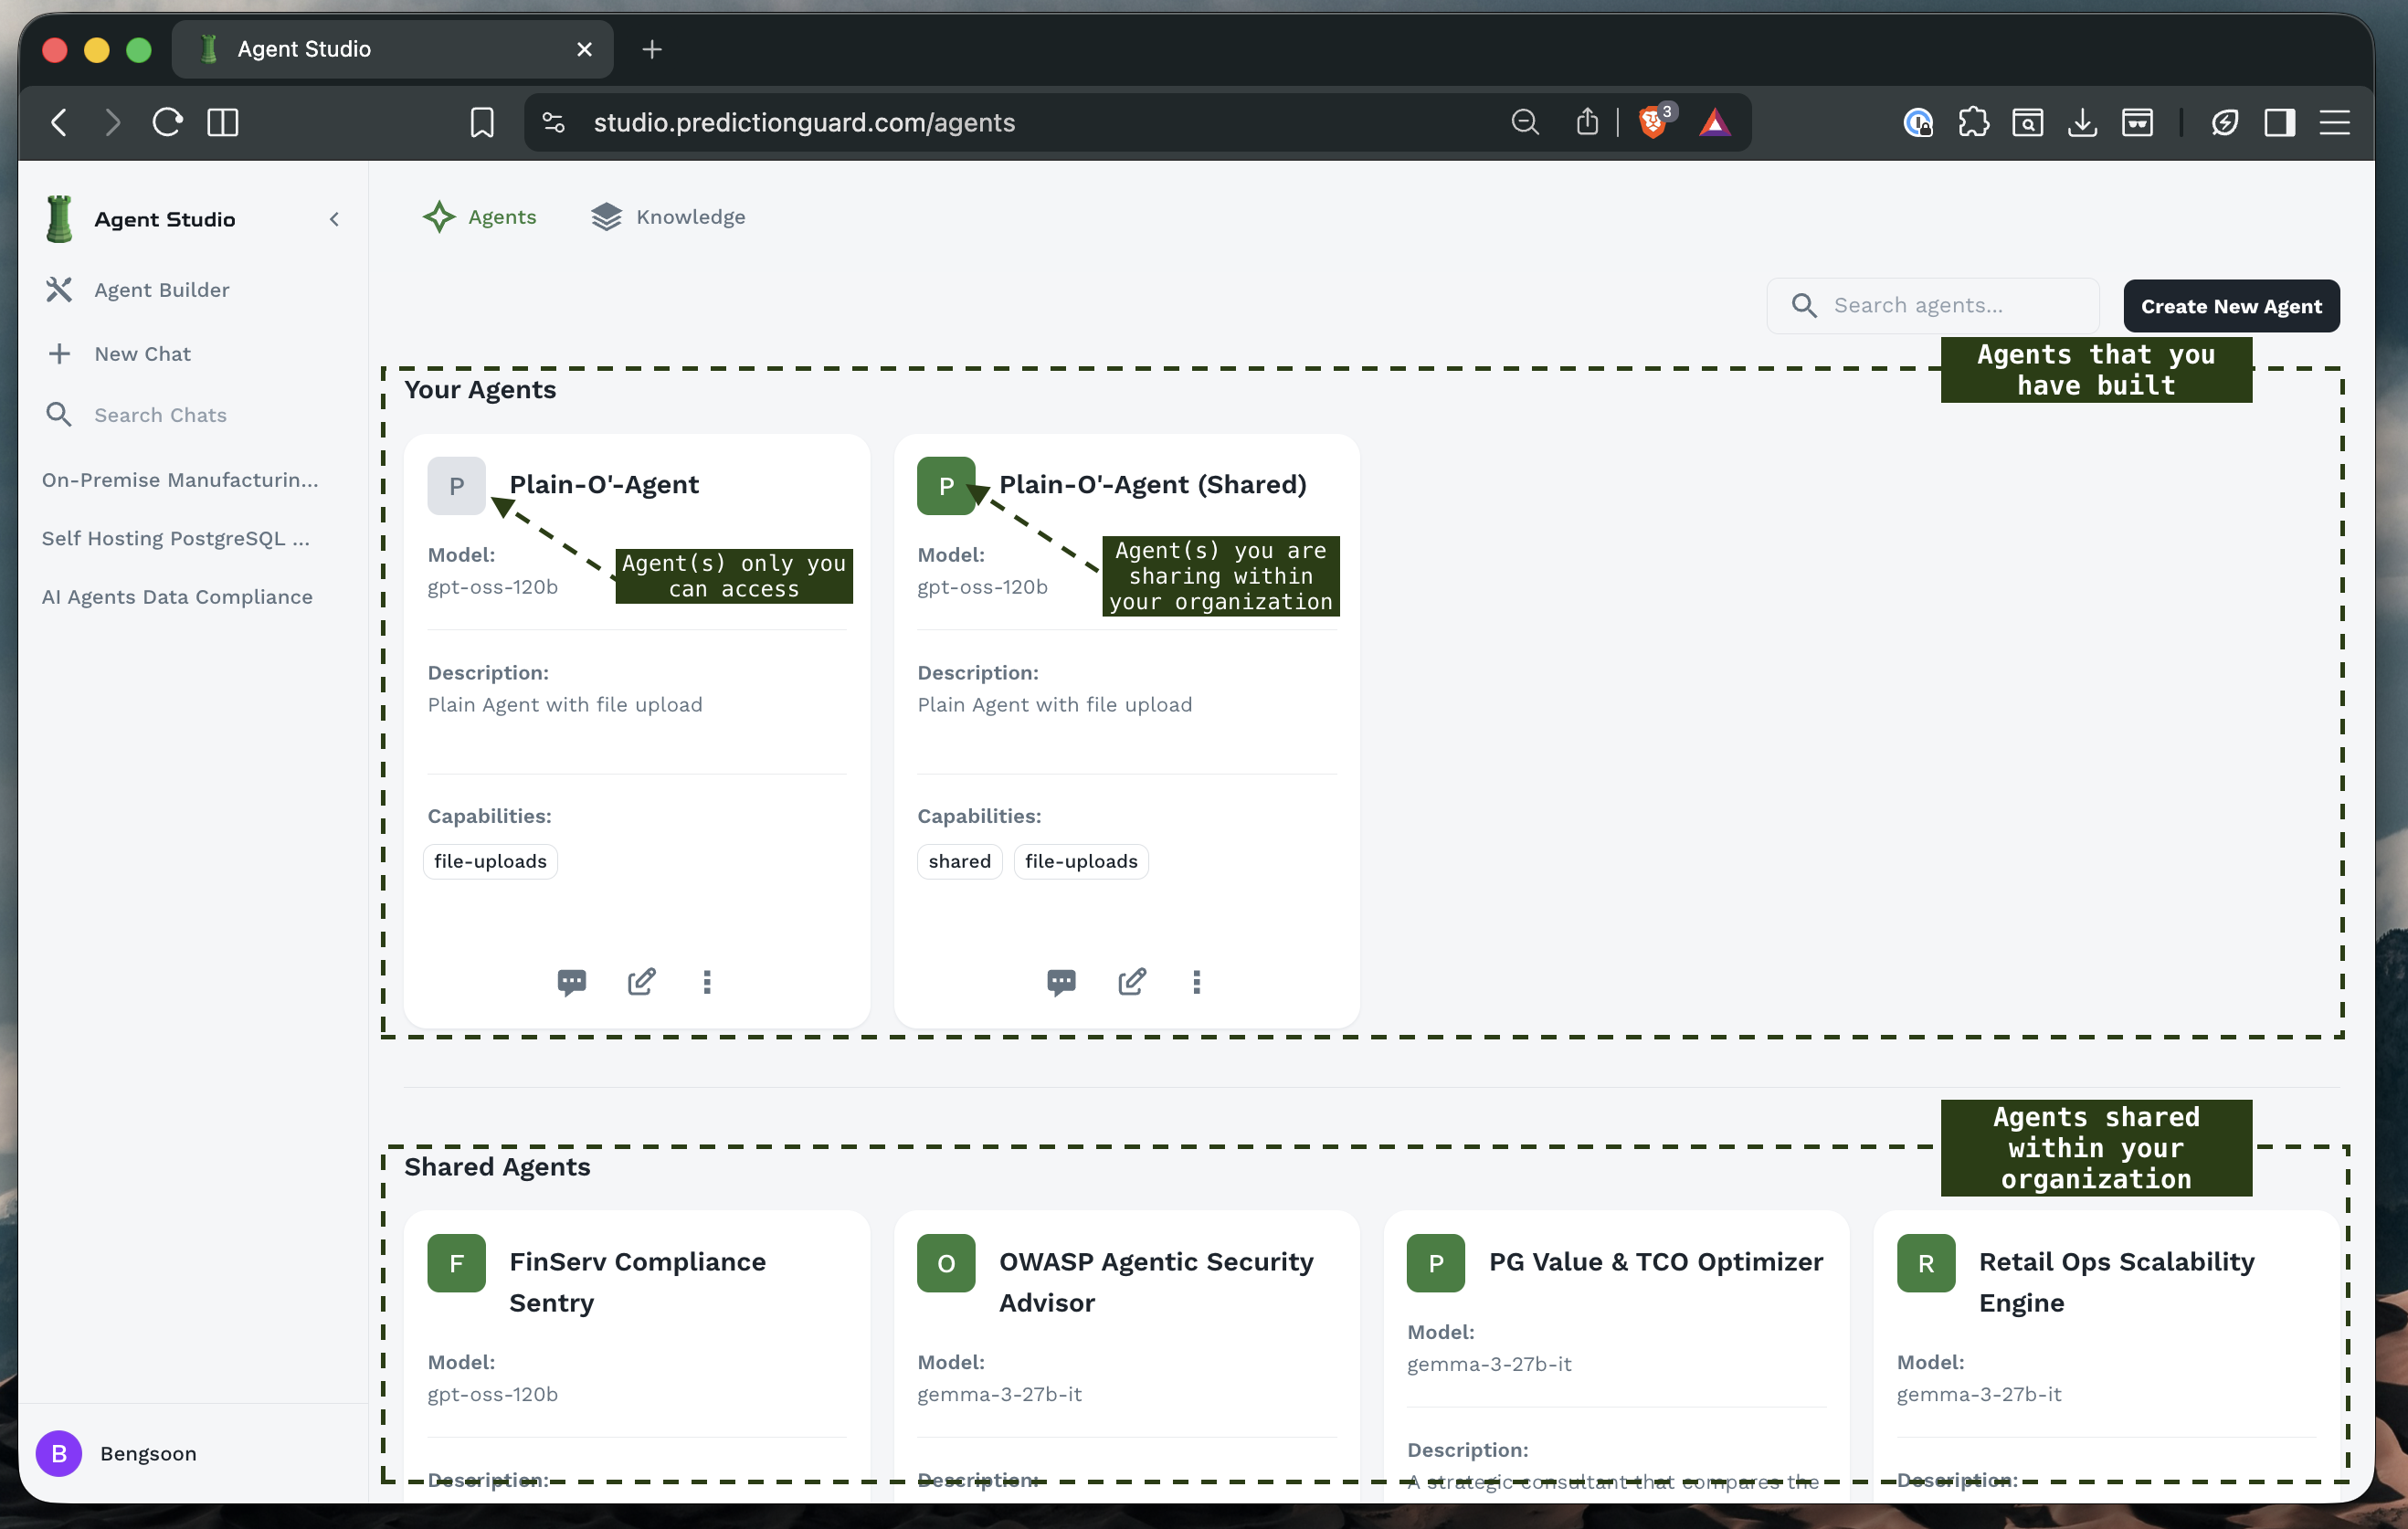
Each agent card shows:
- Agent Name: Descriptive title
- Model: The underlying LLM (e.g.,
gpt-oss-120b,gemma-2-27b-it) - Description: Brief explanation of the agent’s purpose
- Capabilities: Tags indicating special features (e.g.,
shared,file-uploads) - Action Buttons: Options to chat, edit, or manage the agent that you have access to
Beginning Your Chat
Once an agent is selected:
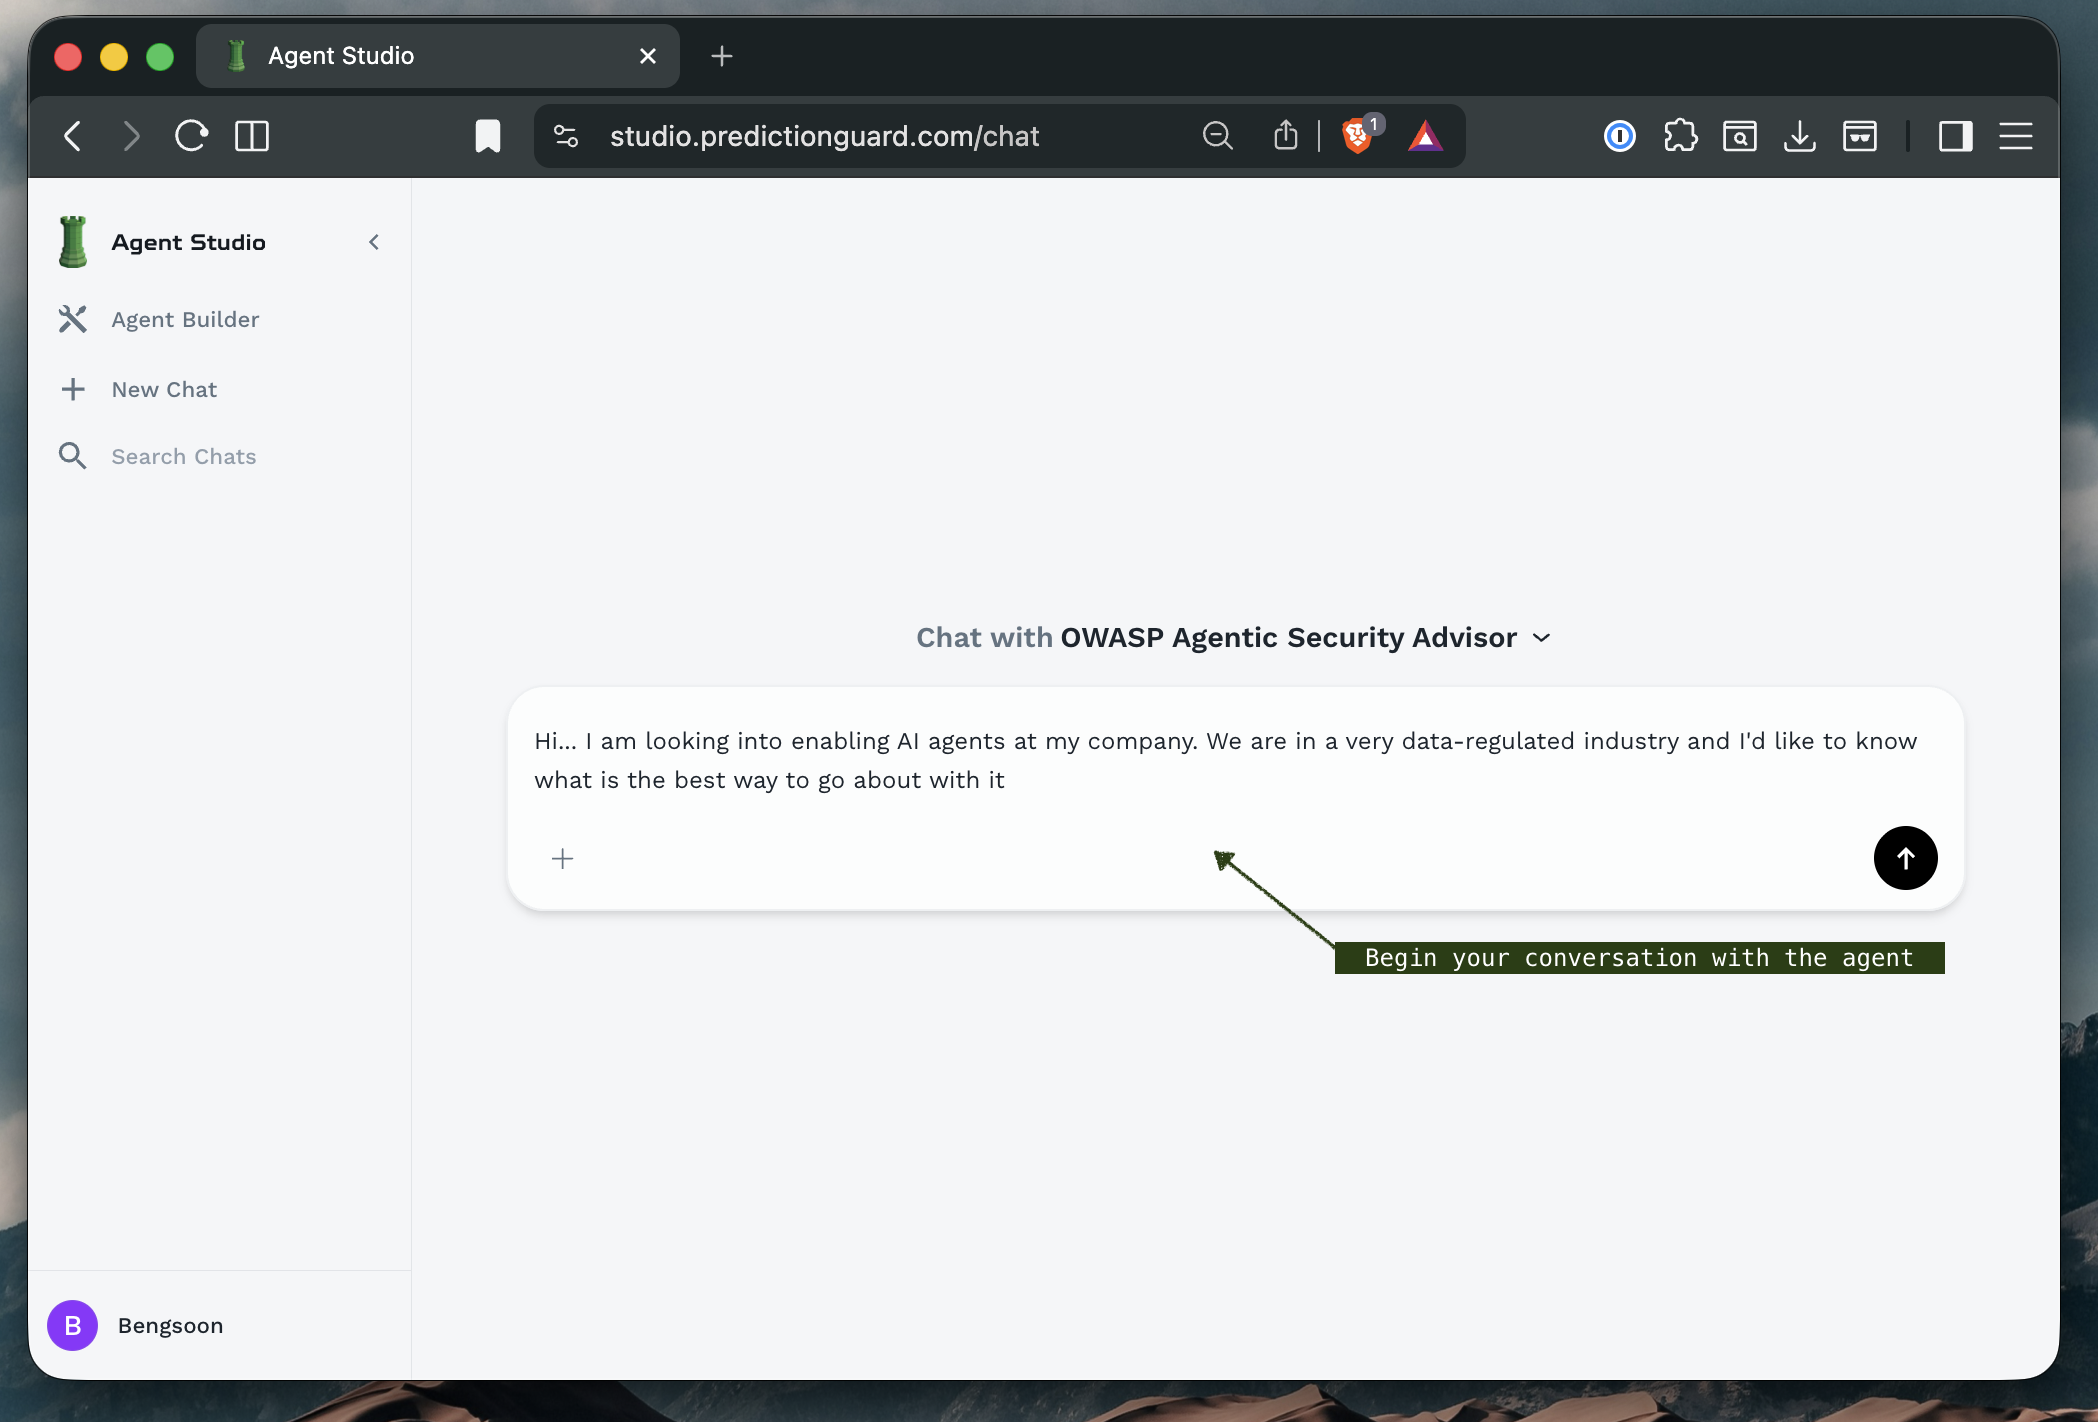
- Review the agent information displayed at the top
- Type your message in the text box at the bottom
- Press Enter or click the send button to submit
- Wait for the response - responses may stream in real-time if streaming mode is enabled
Managing Conversations
Chat Management Features
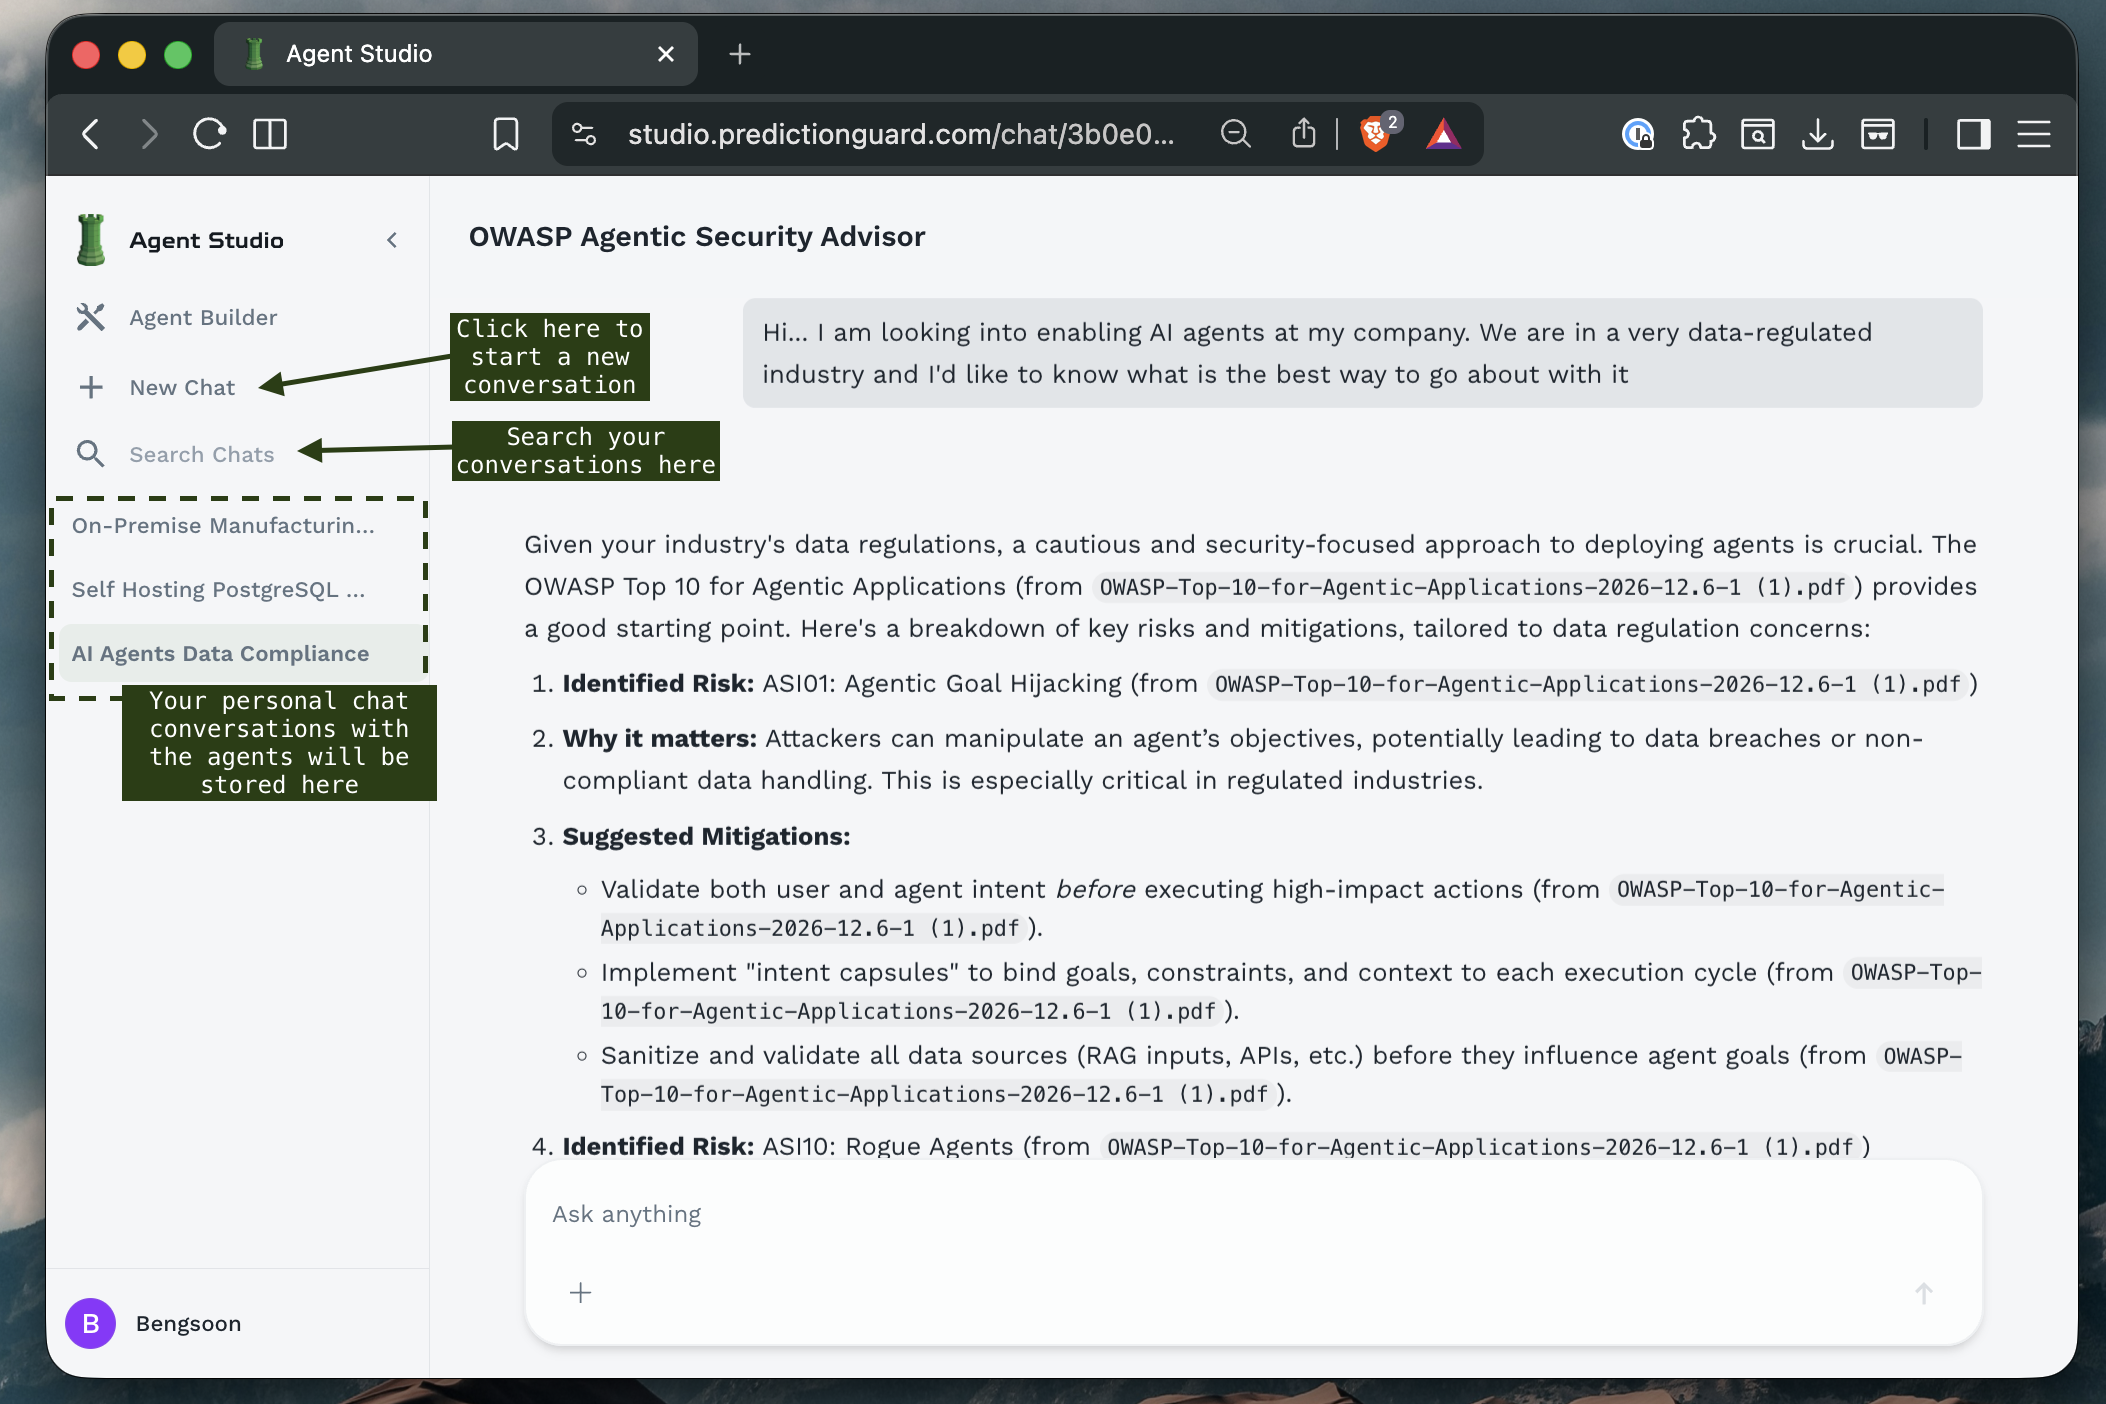
The left sidebar provides conversation management tools:
Navigation Options:
- Starred Conversations: Quick access to important chats
- Search Functionality: Find specific conversations by content or date
- Chat History: Browse all previous conversations
- New Chat: Start fresh conversation threads
Organizing Chats:
- Star important conversations: Click the star icon to mark key discussions
- Search by keyword: Use the search bar to find specific topics
- Delete old chats: Remove conversations you no longer need
Conversation Context
Each chat maintains context throughout the conversation:
- Previous messages are remembered within the session
- File attachments remain accessible during the conversation
- Agent configuration stays consistent throughout the chat
Best Practice: Start a new chat when switching topics to ensure clean context and better responses.
Uploading Files
Agent Forge supports file uploads to provide context and documentation to agents.
Upload Methods
Method 1: Click to Upload
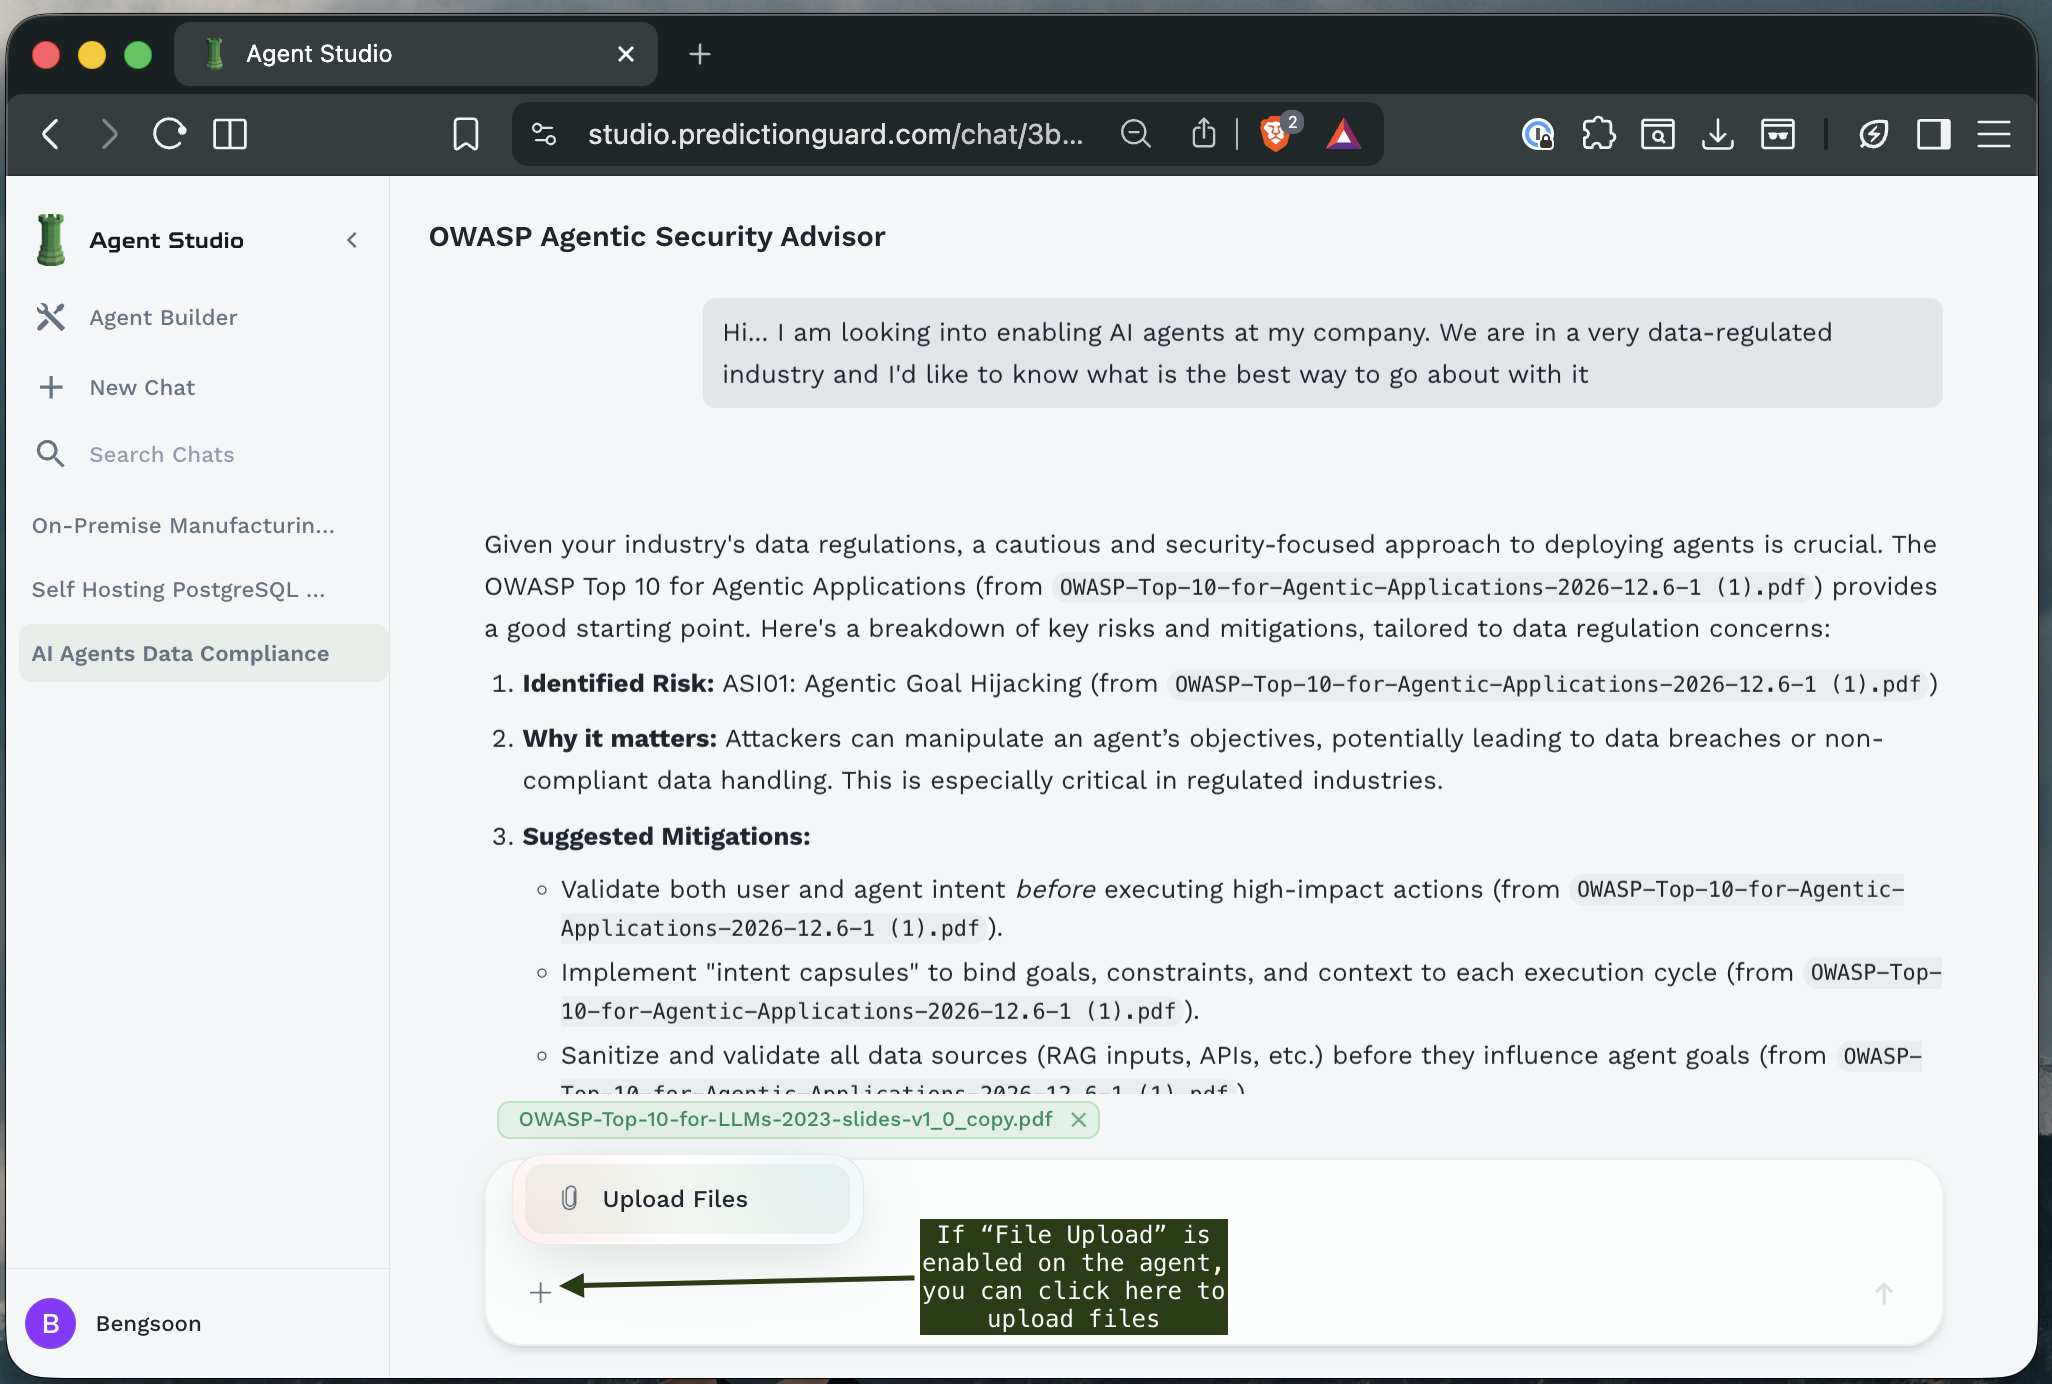
- Click the “Upload Files” button at the bottom of the chat interface
- Browse your files in the file picker dialog
- Select one or multiple files
- Click “Open” to attach files
- Files will appear in the chat as attachments
Method 2: Drag and Drop
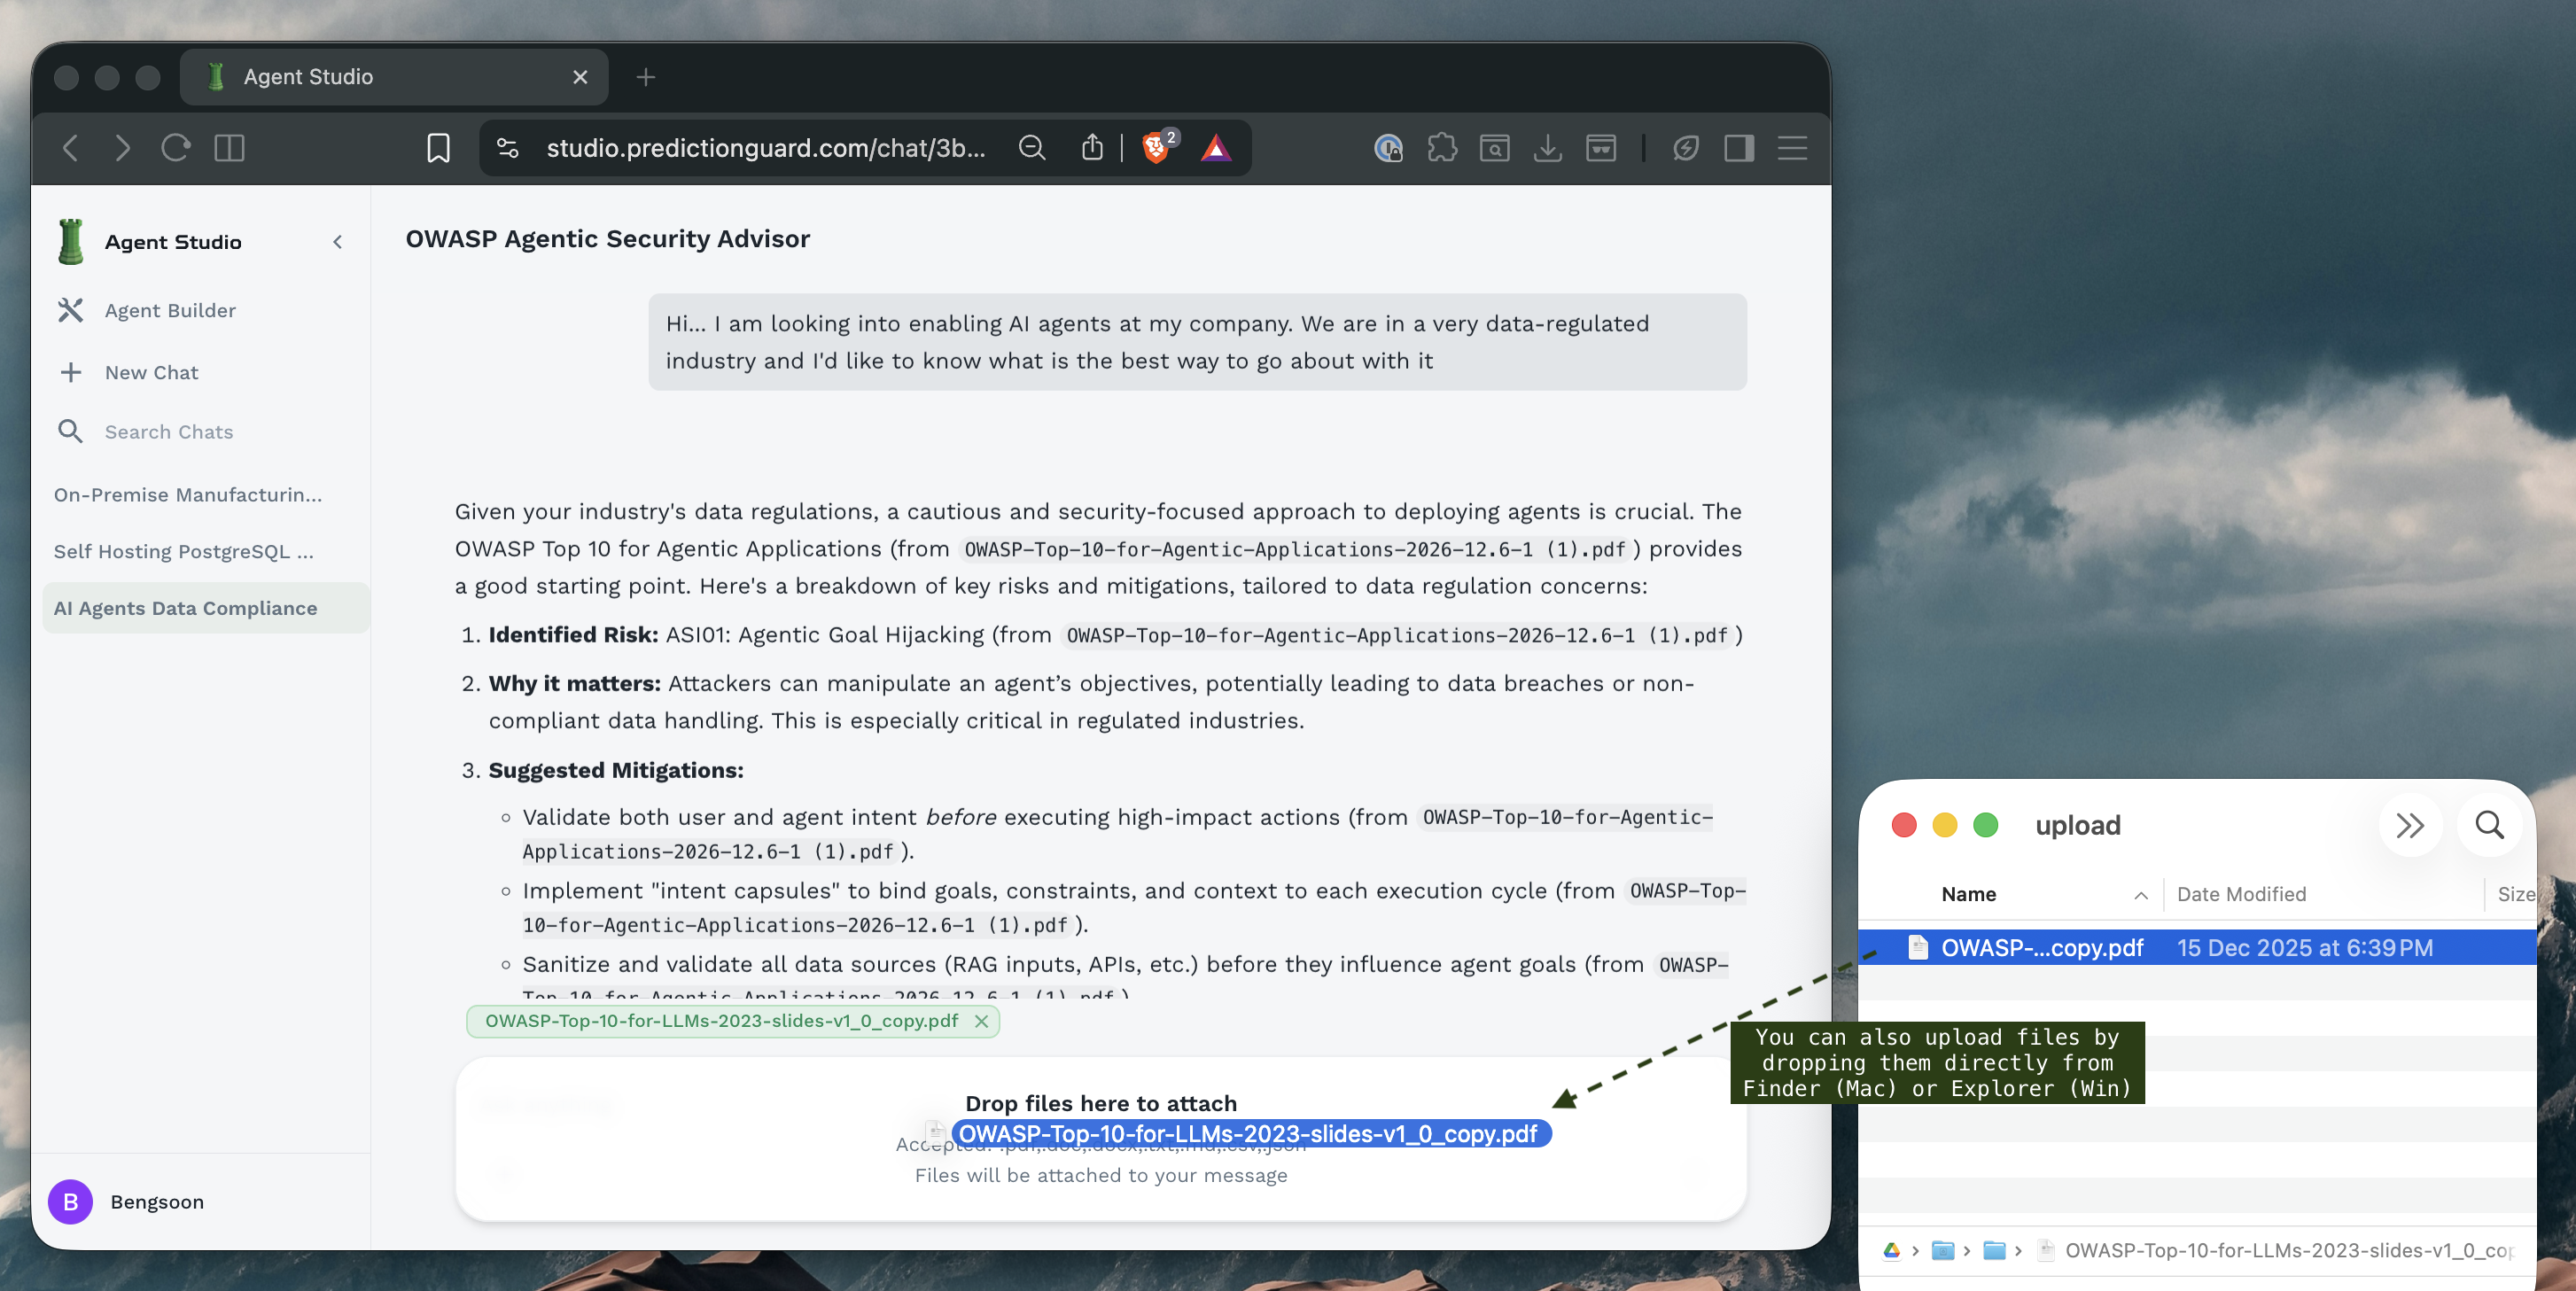
- Select files from your file manager
- Drag files over the chat interface
- Drop files in the designated area
- Files are automatically uploaded and attached
Supported File Types
Agent Forge supports various document formats:
.txt- Plain text files.md- Markdown files.csv- Comma-separated values.json- JSON data files.pdf- PDF documents.docxor.doc- Microsoft Word documents
Working with Uploaded Files
Once files are uploaded:
When Asking Questions About Files:
- Make sure to mention the filename (does not have to be exact) that you have uploaded
File Context:
- Agents can read and analyze uploaded files
- Multiple files can be referenced in a single conversation
- File content is available throughout the chat session
File Management:
- View uploaded files: See list of attachments in the chat
- Remove files: Click the X icon on unwanted attachments
- Updating files: Remove the old file and upload a new version
Best Practices
Getting Quality Responses
Be Specific: ❌ “Tell me about security” ✅ “What are the top 3 security vulnerabilities in REST APIs and how can I prevent them?”
Provide Context: ❌ “How do I optimize this?” ✅ “I’m running a Python Flask API serving 10,000 requests/day. How can I optimize database query performance?”
Use Follow-ups:
- Build on previous responses
- Ask for clarification
- Request specific examples or formats
File Upload Tips
Prepare Files:
- Use clear file names that indicate content
- Remove sensitive information before uploading
- Compress large files when possible
Context in Prompts:
Troubleshooting
Common Issues
Agent not responding:
- Check your internet connection
- Verify the agent is properly configured
- Try refreshing the page
- Contact administrator if issues persist
File upload fails:
- Check file size (may exceed limit)
- Verify file format is supported
- Ensure stable internet connection
- Try uploading smaller files
Slow responses:
- Model may be processing complex request
- High system load may cause delays
- Streaming mode can improve perceived speed
- Break complex questions into smaller parts
Context lost:
- Start a new chat for fresh context
- Avoid extremely long conversations (>20-30 turns)
- Provide necessary context in each message
- Re-upload files if needed in new conversations
Security Considerations
Data Privacy
When chatting with agents:
- PII Detection: Agents may automatically detect and handle personal information
- Prompt Injection: Protection against malicious prompt manipulation
- Access Logs: Conversations may be logged for audit purposes
- Organization Visibility: Shared agents may be accessible to other users
Safe Practices
- Don’t share passwords or API keys in chats
- Mask sensitive data when providing examples
- Review agent permissions before uploading confidential files
- Use private agents for sensitive organizational information
Next Steps
Now that you know how to chat with agents:
- Build Your Own Agent - Create specialized agents for your needs
- Set Up Knowledge Bases - Enhance agents with organizational knowledge
- Explore Advanced Features - Fine-tune agent configurations