Azure Deployment
Prerequisites
- Azure subscription with appropriate permissions
- Azure CLI installed and configured
- kubectl configured for your AKS cluster
- Access to Admin Console at admin.predictionguard.com
Deployment Process
1. Create AKS Cluster
Create an Azure Kubernetes Service cluster:
2. Configure kubectl
3. Set Azure-Specific Configuration
- Node Pools: Configure your AKS node pools
- Storage Classes: Use Azure Disk CSI driver for persistent volumes
- Load Balancer: Configure Azure Load Balancer for ingress
- Virtual Network: Specify your VNet and subnet configuration
4. Create an AI System in the Admin Console
If you have not already created your AI system in the Admin Console, follow the Quick Start or the Custom System guide to create your system and generate the installation command.
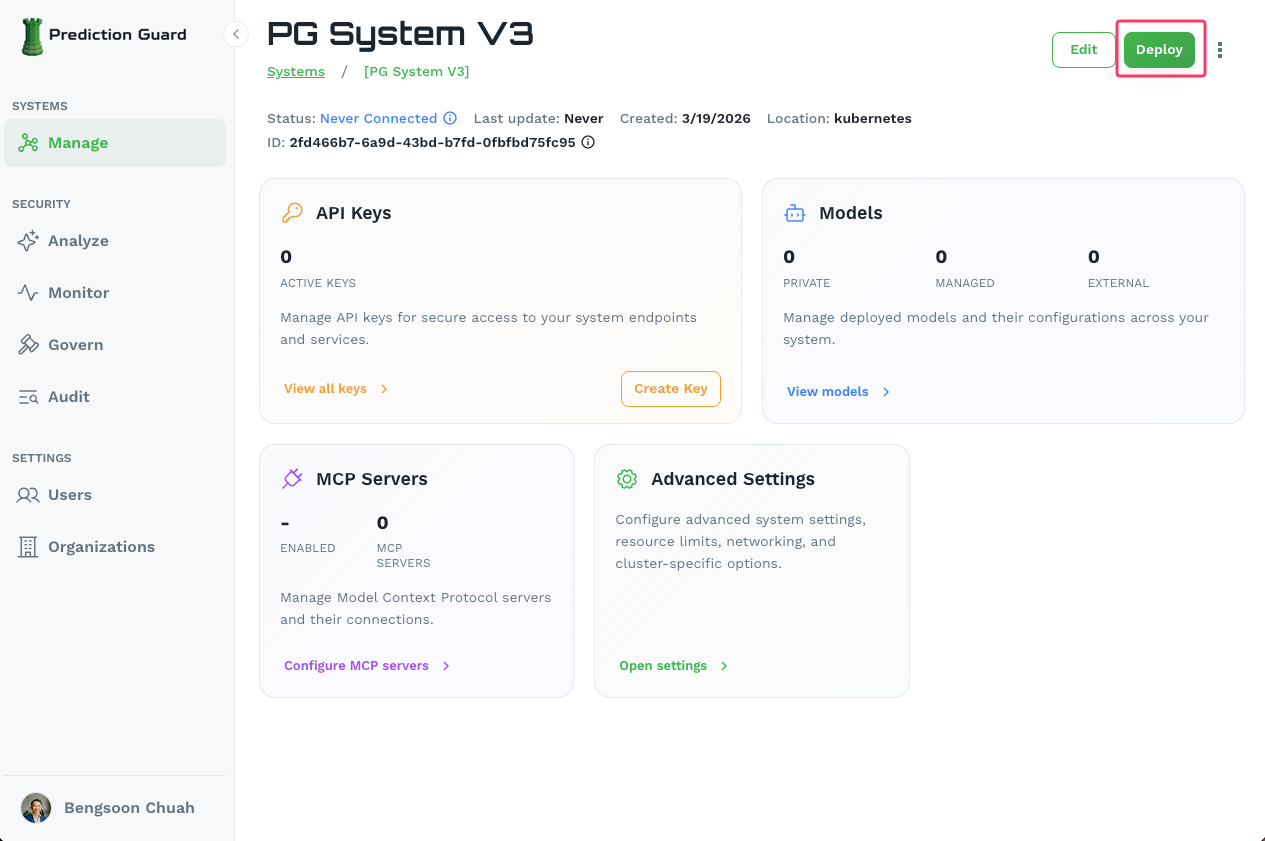
5. Get the Deployment Command
Navigate to your system in the Admin Console and click the Deploy button in the top-right corner of the system management page.
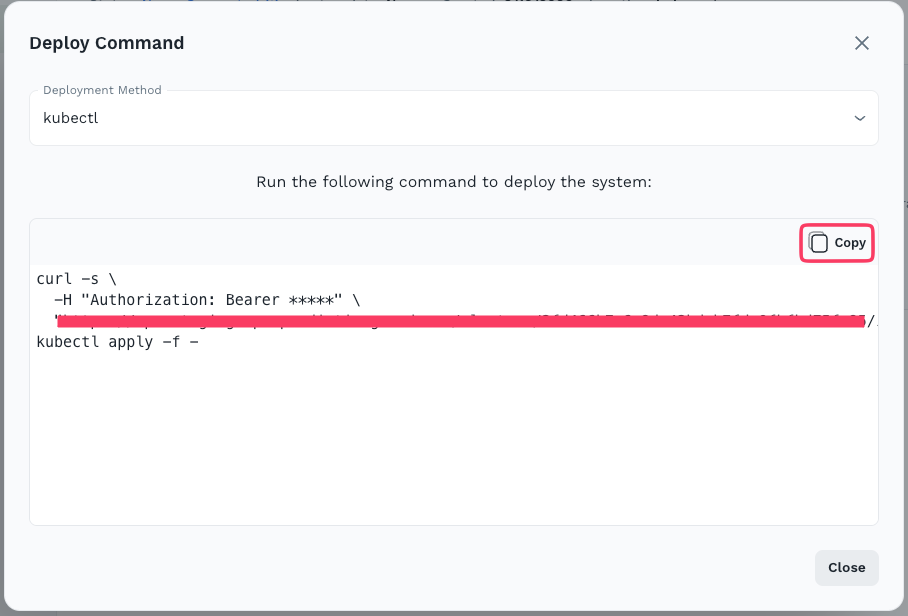
This opens the Deploy Command modal. Select kubectl as the deployment method, then click Copy to copy the generated installation command.
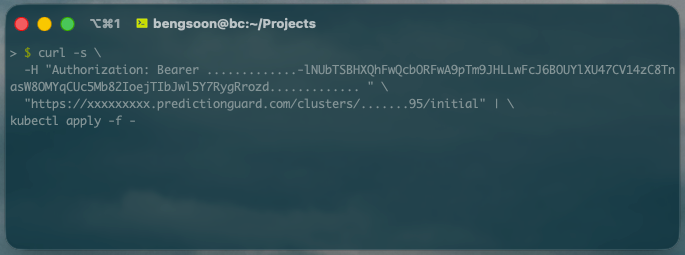
6. Execute the Installation on Your Cluster
Paste and run the copied command on a machine with kubectl access to your AKS cluster. The command authenticates with your Prediction Guard instance and bootstraps all services into the predictionguard namespace.
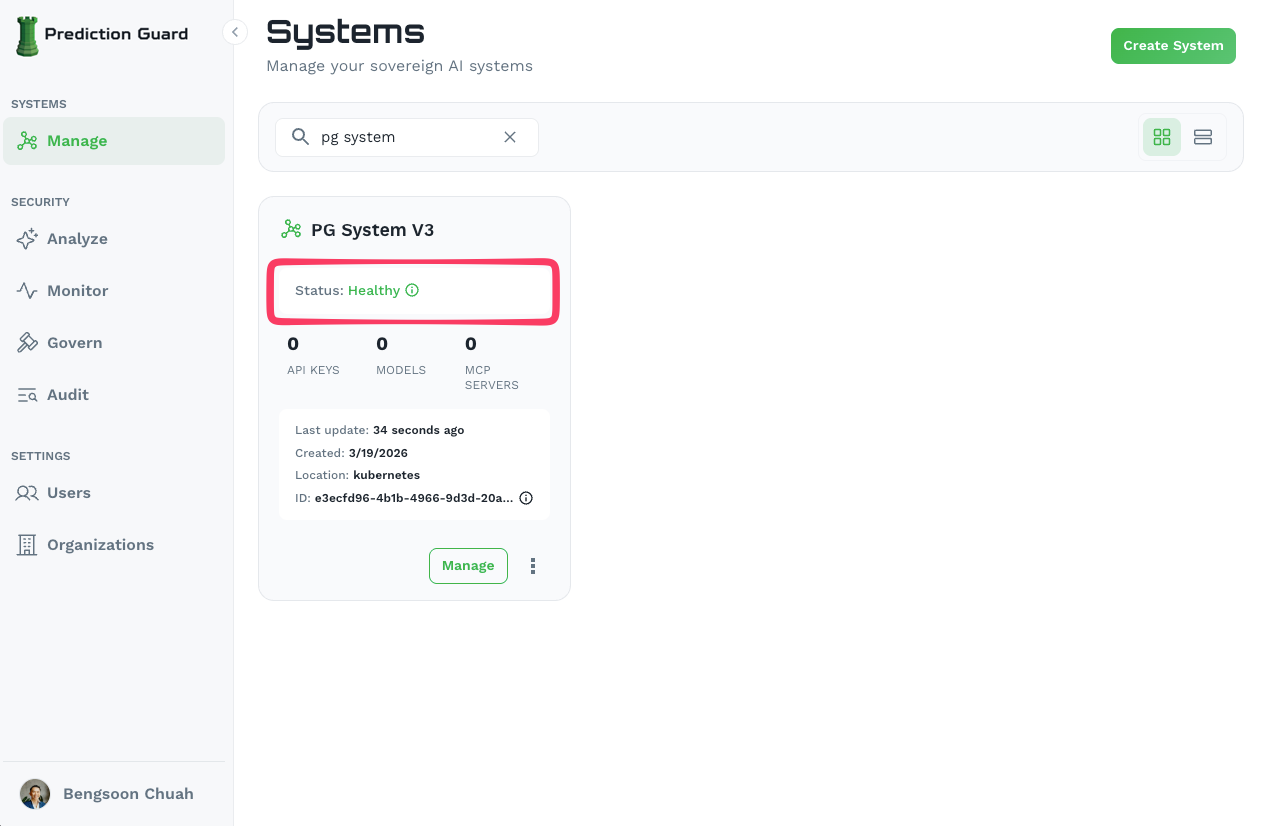
After a few minutes, verify the installation:
You should see running pods including pg-inside, indicating the system has been successfully installed. The system will also show as Healthy in the Admin Console.
Configuring Ingress and Reverse Proxy
Prediction Guard comes preconfigured for NGINX and a default Ingress which can be enabled on the system within the Edit section of the Systems page. Here you can configure the desired domain names and have NGINX deploy into the predictionguard namespace with preconfigured settings for the Prediction Guard API. Then, simply ensure that your DNS entry is routable to the ingress IP on your Kubernetes cluster or load balancer in Azure.
Post-Deployment
Once deployed, your system is fully manageable from the Admin Console dashboard.

From here you can:
- API Keys: Manage API keys for secure access to your system endpoints
- Models: Deploy private, managed, or external models and their configurations
- MCP Servers: Configure Model Context Protocol servers and their connections
- Advanced Settings: Configure system settings, resource limits, networking, and cluster-specific options
Azure Integration
Your deployment automatically integrates with:
- Azure Disk: Persistent storage for models and data
- Azure Load Balancer: Load balancing for high availability
- Azure Monitor: Monitoring and logging
- Azure Active Directory: Service account and role management
Need help? Contact our support team for assistance with your Azure deployment.